Showing posts with label Mini-Quilts. Show all posts

Friday, March 23, 2018

Stuck in a rut, or just avoiding the big starts?

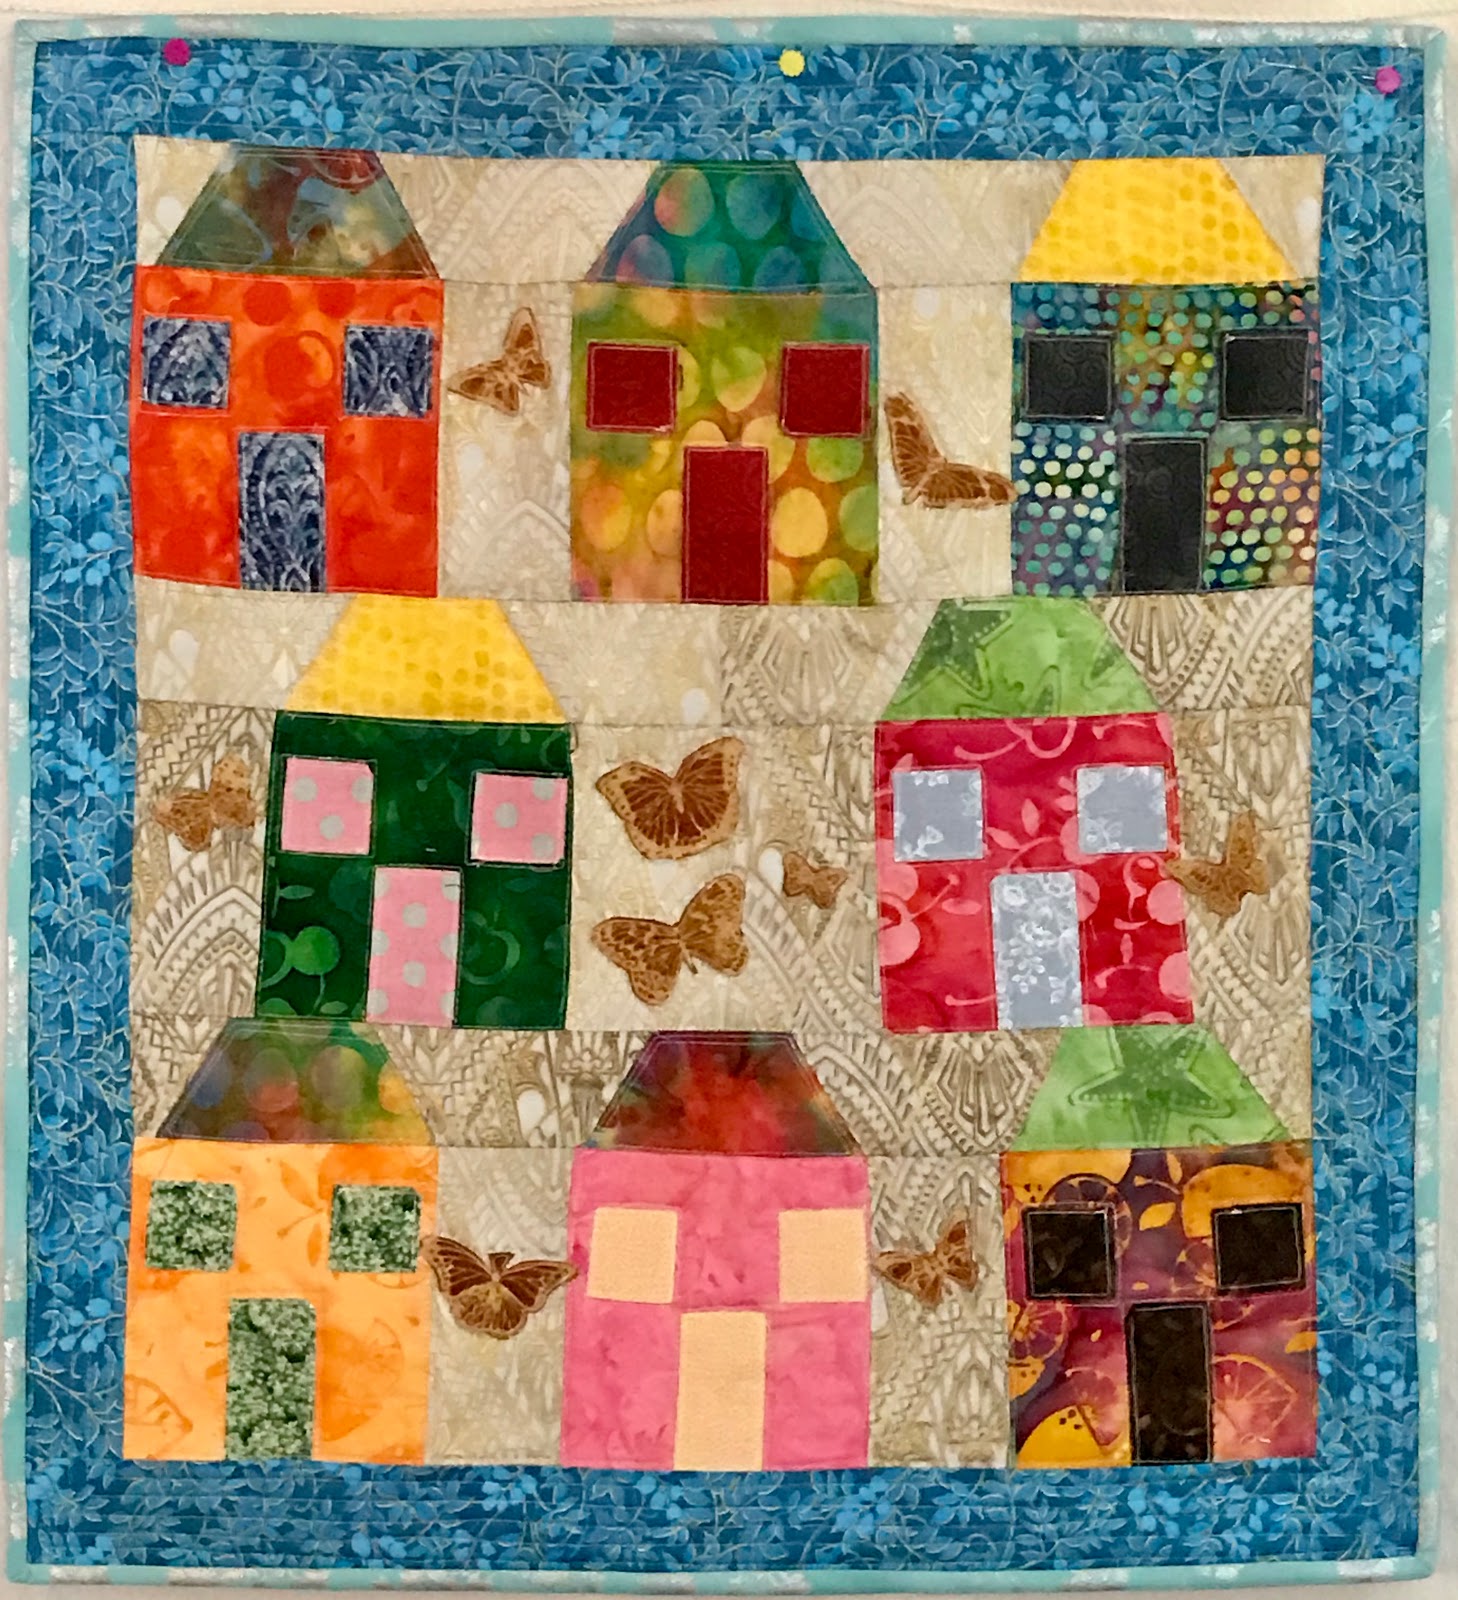
I thought I'd skip the March mini from SewCanShe as I don't really like applique all that much.  I decided to do one of my desired quilts, which is a house quilt, and guess what, there ended up being a good bit of applique.  I started out with Missouri Star Quilt Companies mini house quilt, which was a take off on their full sized "Won't You Be My Neighbor" quilt.  I should have watched both videos, I messed it up from the start and decided that mine should be called "Crooked Houses in a Butterfly Garden".
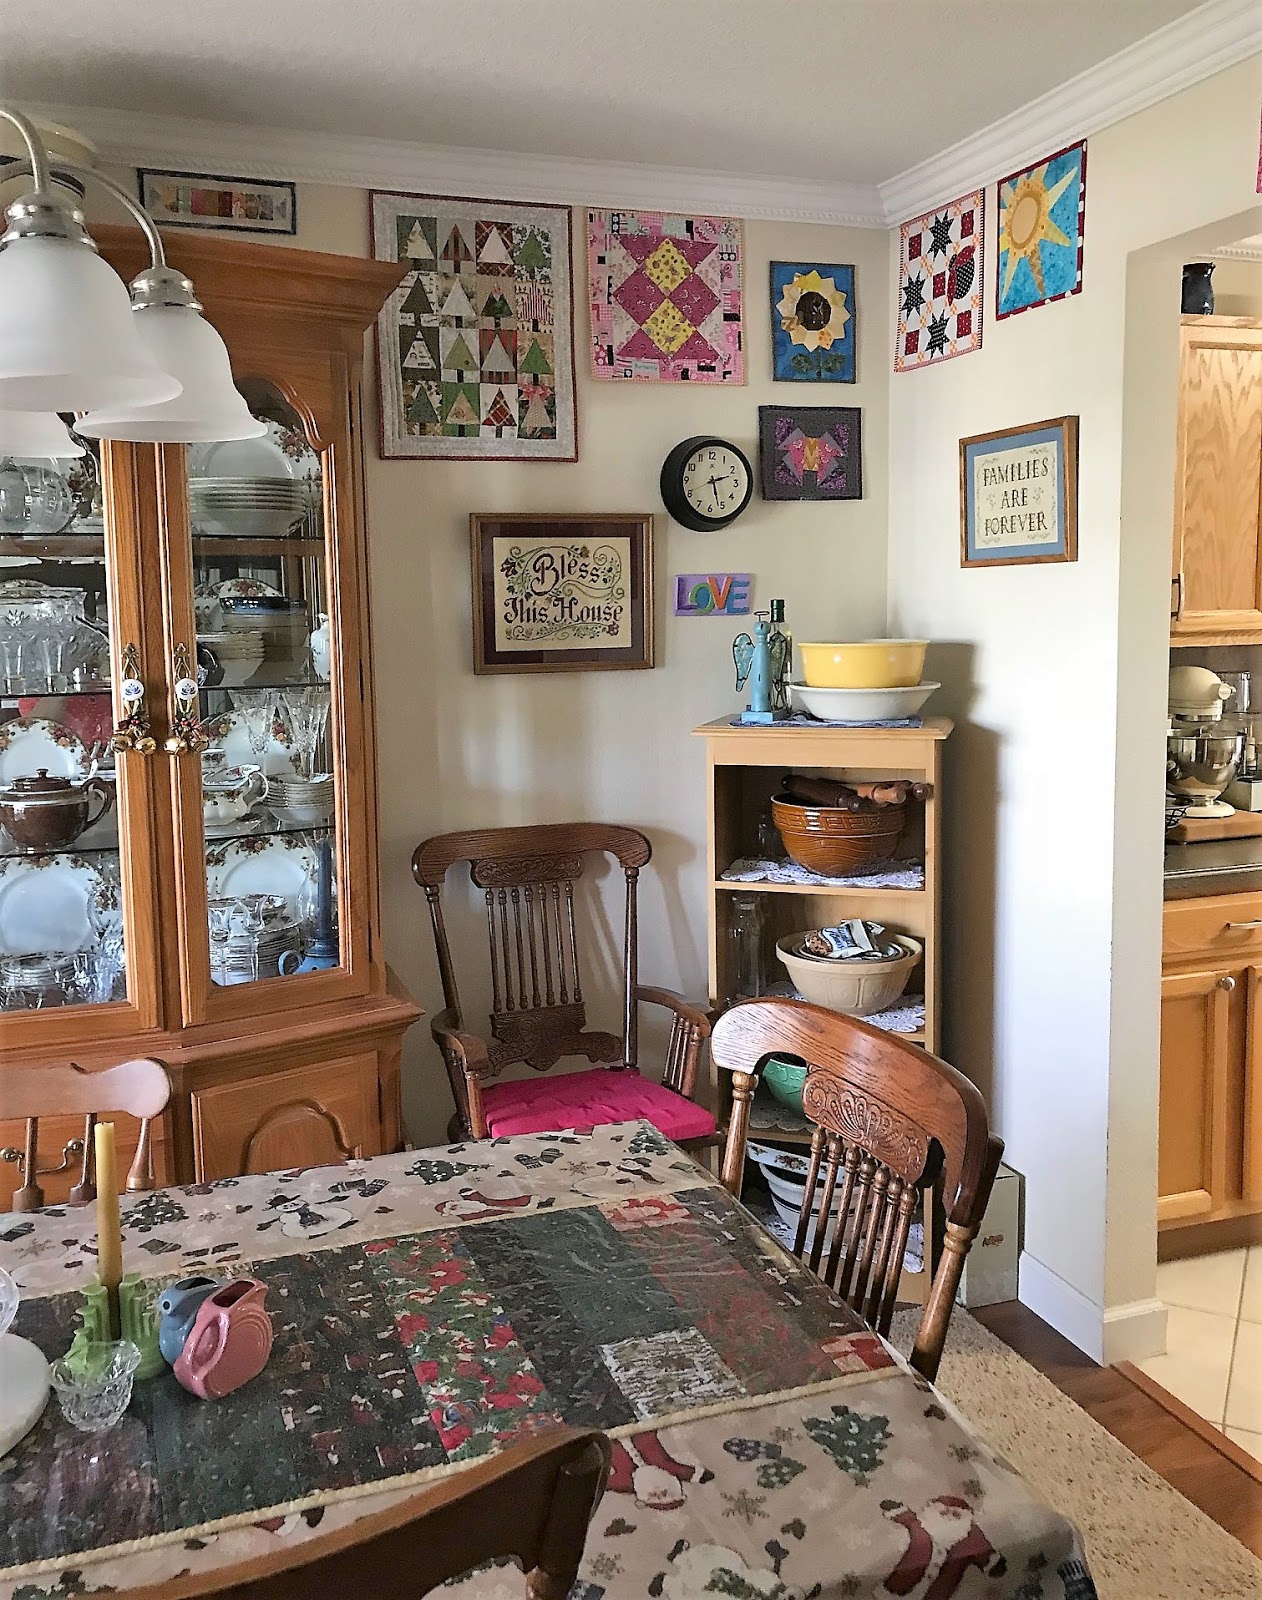
And, the minis I've done so far this year, at least at the time.
I decided that I needed new trash bags for the car, as the ones I made a few years ago are very sun faded.  This is from a tutorial on SewCanShe's blog.  The Back.

The front.  I made a few changes, and this is one.  My husband has allergies and uses a lot of tissues, so I wanted a removable trash so that  emtying it is easier.

I also wanted it to hang from the glove box, not the gear shift.  It stays in due to buttons sewn to the ends of the little straps.
Then I decided that I wanted something a little girlier, since even though my husband uses the Diddy Bag most, it's technically my car.
And, then I decided that since I forgot the interfacing on the previous trash insert, I'd do another with interfacing.
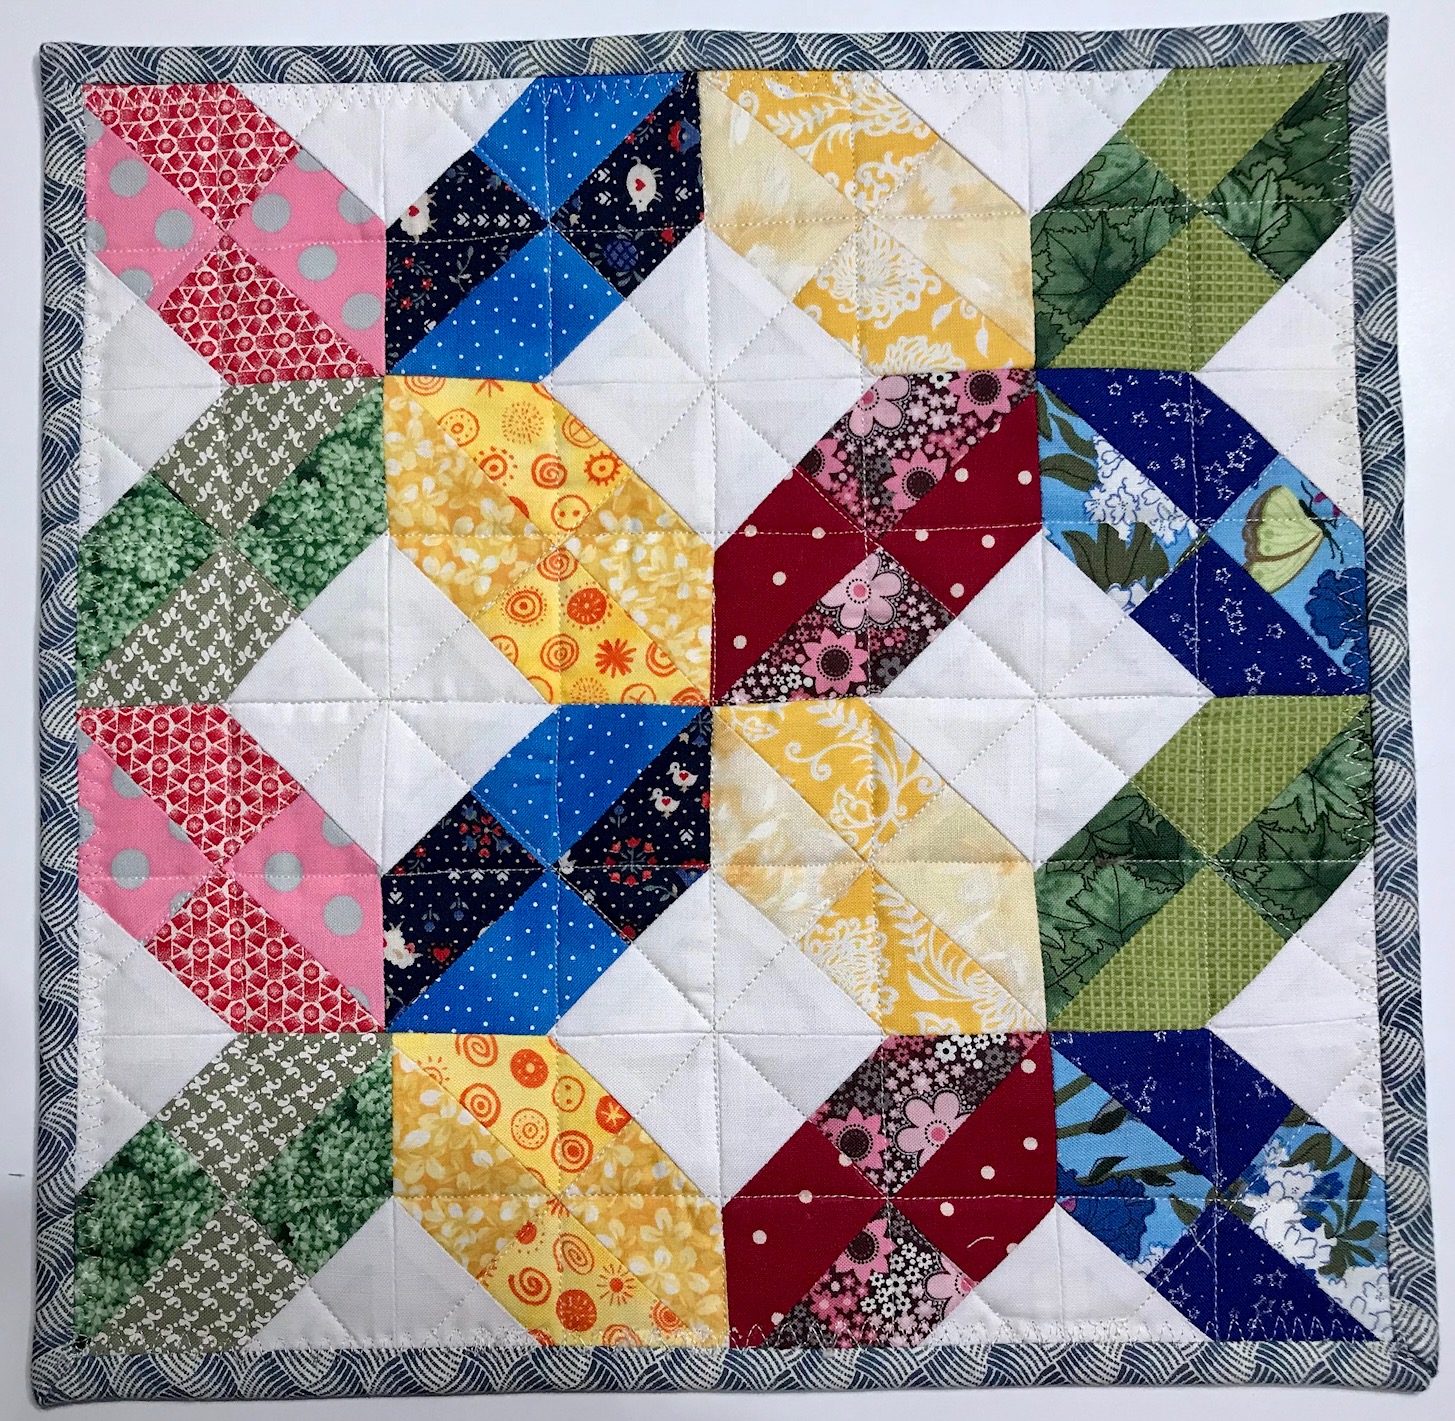
Another  mini that I wanted to do is the "Spool" mini.  I used the same charm pack as I used for the houses, and I started off with Kea Bee's Tutorial, which was from https://thimbleblossoms.bigcartel.com/product/spools-pattern-154-paper-pattern.  Since I didn't have the actual pattern, I had to wing it a bit, and hers is 14 x 16, mine ended up about 16 x 18.5
My finished mini spool quilt.  I'll be sharing these on SewCanShe's Show off Saturday
And, I almost forgot to mention what I used the first Diddy Bag for.  I added button holes and hung it next to my cutting table, now I have a little bag for scraps and extra space for a few tools.  So far, I'm liking it there.

Also, I'm very excited.  My grandson is hanging this for me tomorrow in my dark, dark, sewing cave (if my order for the hanging parts comes from Amazon tomorrow).  Maybe, I won't have to use a flashlight anymore to try to find fabric in my dark wood cabinet.  It's not the prettiest light, and I do sew in what would normally be our living room (I use the family room for our living room), but I hope with the pretty hooks I ordered and the decorative pull that it won't be an actual eyesore.

Saturday, March 3, 2018

Pineapples, Color Wheels, and a little bit of Etc.

I was so happy to pull up Sewcanshe and find that my mini pineapple quilt had won the Show Off Saturday Linky Party.  Pineapple's seem to appeal to people.  I like them because they are a symbol for welcome. 
I bought the Connecting Threads color wheel quilt kit from Amazon several months ago and I decided it was time to give it a try.  There was a little more to it, as each piece has it's particular place, but it was fun to make and I think may be one of my favorite minis.  It will definitely need to be in my sewing room.
So, I put it up on my design wall (which is really a temporary addition to the front of a cabinet) and asked my husband which he liked best of the mini's I had made so far this year.  He looked and showed what he felt to be husbandly support of my efforts, and decided he really liked the pineapple, but wished it were bigger.  
Sooooo.  I upped the size of the squares to 2 1/2 inches, 2 inches finished, and this is what I came up with.  There was supposed to be more of the black and white in the binding, but I misfigured.
And now my original pineapple mini has a big sister.  The finished size of the larger one is about 12 1/2 inches by 18 1/2 inches.
Now, this is my minis for 2018 wall.  I know it's a bit excessive.  I think that I'm doing all these small projects as a wall of procrastinating getting back to my large quilts.  I must say though, I'm really looking forward to SewCanShe's March mini.  I will hook up again with the Show Off Saturday Link Party.  It's fun to look at, and to participate in, take a look.  (I also have a houses mini and a spools mini on my list of to do's.  I have no idea where I will put them all.  Maybe, in the hall)
Bee In My Bonnet's beelori1 has a tutorial for string blocks on her blog.  I have tried string blocks before, and pretty much hated the whole process, but I thought I'd give it another try her way.  I still don't love making them, but I didn't hate it as much and I plan to make more to see if they grow on me.  After all, I love how they look.

Sunday, January 28, 2018

Misc. Projects, Mini Quilts, Baby Quilt, Etc.

To my surprise, the monthly mini quilt continues this year at Sew Can She.

That's what the Sweet Flora Mini Quilt is supposed to look like, this is mine.  I mistaken thought that the 1 inch hexagons were 1/2 inch, and so I had lots of empty space.  I may make another, as my great-granddaughter got baptized this weekend, and I gave this one to her.

A young couple we know are having a baby boy any day, this and the burp cloths that I recently made are for them.

The back of the mini quilt.  

For another younger great-granddaughter.  The pouch is leftover fleece on the outside and the tote bag is made from valentine tea towels that I got yesterday at the Dollar Store.  When she saw my daughter's journal cover etc., she wanted one, too.  

My granddaughter requested a tote to use when she takes one of my young great-grandsons to day care.  I also shared my link on Sew Can She.  Lots of projects to look at and read about there.

Wednesday, December 20, 2017

My Mini Quilt Wall (Walls)

I had to go dig in the garage for Easter things to find this one.  It was the only one that I had done before, and it was probably 15 or more years ago.  I figured I could probably handle eggs.  This one is mostly hand quilted, and was when I was using polyester batting.  It is nice and soft.

Here's the long view coming in from the foyer.  It is through my sewing room, as the living room part of the living room dining room combination is now my sewing room.  I sure do hate people coming into my often messy and always cluttered sewing room, but I do feel fortunate to have one.
These are mostly from SewCanShe's year long mini wall quilt sew along, although the bookshelf is from Don't Call Me Betsy, and the one on the top left of the china cabinet was because I needed 1 more for that spot.

One wall didn't seem like enough, as you can see, it takes the corner.  After Christmas, I feel like most of us are looking forward to spring, so I tried to use my spring and then summery mini quilts.

Then, back into fall.  

A little better view of fall, the little one was my bonus quilt.  Thank you to SewCanShe for a fun quilt-a-long, and to Don't Call Me Betsy for sharing her bookshelf mini.  I'm a sucker for the $.98 salt and peppers from Cracker Barrel, and the cross stitch is one I did many years ago for my side of the family.  There's a bigger one for my husband's side, there were 5 kids in his family and only 3 in ours.  
PS  I know this might be way too busy for many people's taste, and they may end up that way for me, but I figure that I put them up with the Command Damage-Free Hanging things, so if I get tired of them, I can always take them down easily, unless Command Brand lied.

Wednesday, November 15, 2017

February - September Mini Quilts

MAY
FEBRUARY

MARCH

APRIL


JUNE

JULY

AUGUST

SEPTEMBER

I can't seem to stop, lol! 

Monday, November 6, 2017

Small Things Amuse Small Minds

I received my daily Email from Sew Can She this morning and for some reason the November mini quilt gave me the urge to make mini quilts.  I decided to start with January, and this is the result after a few hours.  My desire is to do all or most of them and have a mini quilt wall somewhere in the house.  

My granddaughter-in-heart alerted me to an ill child on the internet who was requesting Christmas cards, so I decided to try my first homemade card ever.  This is supposed to be a Christmas tree (I know, they are usually green, not red) with a shiny gold star on top.  

I sewed the letters first, but they were so faint that I traced them with a Sharpie pen.  I was kind of pleased with my free cut stars (I told you small things amuse small minds, I have no artistic talent, so it doesn't take much).

Another of my semi-awesome stars.

Of course, I didn't have the right sized envelope, so I had to make one, which I was also semi pleased with.